Showing posts with label inspiration. Show all posts

Tuesday, August 4, 2015

Summer time is time for street fairs......

...and we have been helping some local businesses with setting up there booth. Here is one example in which case we did the pre set up in there office space and they moved it to the street the day of the fair.
Here are some tips for setting up a booth:

  •  Choose a layout that works with your product: 
    • Walk in ( 2-3 tables) along the perimeter very interactive choice, great for arts and crafts and large items and  also great for picture, photos and print art.
    • One table in center with you behind the table great for Jewelry and smaller items for sale, you have better control and overview of your product.
  • Keep it organized, clean and always have  a table cloth or a skirt that will hide the boxes, electrical cables etc... 
  • Keep your displays full but not cramped, use props to create height and levels.

  • Make sure that you fill out the space well and use the vertical space, items displayed where the eye can sweep over them at a glance—and see the entire selection—are far more likely to result in higher sales.
  • Make your booth as eye-catching as you can and a reflection of your brand. Be creative and have fun. For inspiration here is the link to a Pinterest board that focuses on booth design:  Fair biz on pinterest  
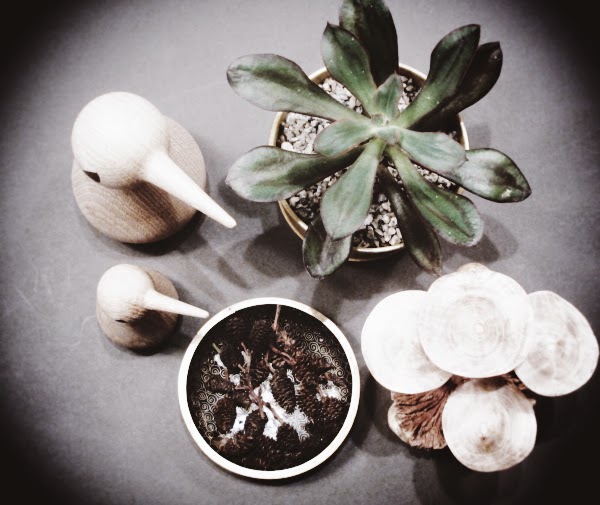
and here are some table top examples :


designed and set up by Updesignlounge for the Herb Shoppe Pharmacy in Portland Oregon


Friday, June 5, 2015

Hand Made Displays

Me working on the new sign for the summer displays at the Herbshoppe. These hours of creativity are always some of my favorites. I enjoy the design process so much and it really makes me so happy that I can create these really special displays by hand for my amazing clients. 


********

Tuesday, May 26, 2015

It's called PLANOGRAM !

For a good few years now I have been designing the shopwindow and changed the visual merchandising at The Herb Shoppe here in Portland, however something that lot of people do not know is that I also design the window for their store in Brooklyn NY. OH WOW !! So you fly to NY once a quarter people ask, OHHHH  I wish ( I love Brooklyn) but no, what I do is I create what you call in the industry a "PLANOGRAM". What that is, is a detailed plan of implementation with sketches, pictures and a  (somewhat) detailed plan on how to implement the window. That "PLANOGRAM" , including all the props that I have gathered, gets sent  of to  the store in Brooklyn so they can implement it.

Here is what that looks like (note this is a really simple one usually I get much more into detail):

The sketch


and here is how it looked like  after they implemented it :


Thursday, March 26, 2015

trip-ping in europe

I just came back from a sweet 19-day trip around Europe visiting Hamburg, Vienna and Copenhagen. These cities are amazing for window and retail shopping and I had the good fortune to get an inside look at a few beautifully-designed shops, got to talk with some of the talented artists who own them, and took loads of pictures.

Today, I want to start with one place in Vienna (which is one of my favorite cities in Europe)  I have visited often since one of my best friends, Sandra, lives here and she always knows the best places to go. Her best friend is a good friend of Sandra Haischberger, the talented artist and owner of the Porzellanmanufaktur and the shop, Feinedinge*

Feinedinge* is a beautifully-designed shop that is candy to one’s eyes and the beautiful porcelain creations she makes  are impossible not to love—and yes I indulged ;)).

Enjoy !!!!!! 

OH and here is a TIP: Simple shelving and furniture pieces, painted make beautiful fixtures, that's what they did here!


what a beautiful visit, thank you so much feinedinge* team !!!  -  ULLIKA

Wednesday, February 4, 2015

defining my blogg !!

Spring cleaning !!!!

Yes me too and every year I look at my Blogg seeing what I can improve, add on and expand (and maybe perch :/ )  For 2015 my goal is to reach more people especially in the small retail world. That is why I am going to create a new post each month focusing on exactly that. The idea is to feature one local business and add some solutions that they do really well in their store or that they have some challenges with and by talking to them we could come up with some solutions.
Today I made it out to the new location of Cargo here in Portland, OR and talk about a store with ATMOSPHERE. The place is packed with beautiful nick necks, clothing and furniture,  beautiful arranged and decorated. A perfect example for creating an EXPERIENCE to be remembered.
  TIP: Be ENTICING with the visual arrangements in your store !!!

CARGO

Tuesday, December 2, 2014

Winter Wonderland

Wishing you all a wonderful holiday season!!!! Here is a great
 before and after from our window styling files this year.
 This is the window at  Queen Bee Creations in Portland Oregon

Before

After

 Queen Bee created the back drop ( which is also one of their prints and available as bags etc..)
UP Design Lounge  did the design, created the props and did the installation.

Thursday, November 13, 2014

Shop Window Styling 101: Where to start.....

Here's a visual step by step tutorial on how I go through the process designing and creating a new window display.
What you need:

  • a photo of the shop window you are going to design
  • tracing paper
  • 2x binder clips
  • pencil
  • ruler 
  • color pencils 
  • eraser (just in case)

Gather the tools.
I use a mechanical pencil, this one is from
 Muji *one of  my favorite stores. 
A photo of the window.....

tracing paper ( available at office depot)

place tracing paper over photo...

......and secure with binder clips

user your mechanical pencil to draw the outline of the window
onto the tracing paper.....

......take the tracing paper off.....

....now start drawing in fixtures or furniture you might have
on your mind  or  that already exist in the window.

add sketches of props....

and more ideas.... like painting a frame drawn on the window
 with a glass marker

and more layers and more layers .....
Here I bring in the color pencils ;)
I usually do this whole process  2 or 3 times
until I have my visual picture completed.
After that I go into prop design...........
(See my next post coming out  in the end of November:
Shop Window Styling 101: creating props )

GOOD LUCK !!!
And feel free to ask me any question ...

*Ullika*


Monday, November 3, 2014

Visual Merchandising : explained

"Visual merchandising is a major factor often overlooked
in the success or failure of a retail store. It is
second only to effective customer relations.
Visual merchandising can be defined as everything the
customer sees, both exterior and interior, that creates a
positive image of a business and results in attention,
interest, desire and action on the part of the customer. A
story can be told that communicates to the prospective
customer what the store is all about. It includes the
dramatic presentation of merchandise as well as other
important, subtle features that create the store’s overall atmosphere."


Effective visual merchandising does not need to
cost much. The cost for this display was less
than $40 in materials and about 1.5 hours in man power.


Thursday, October 30, 2014

5 Things: Inspiration


5 things you need to create labels  with for you store or gifts


5 things I gathered that dear friends gave to me 


 5 things that I arranged